Looking to beat the heat without leaving unsightly holes in your window frames? Installing a window air conditioner without screws is your solution. It’s a seamless way to enjoy cool air while preserving the integrity of your window frames. Choosing the right air conditioner is crucial, as not all units are designed for a no-screw installation. With the proper brackets that hook onto the window, you can secure your unit safely and effectively, ensuring it stays put without the need for drilling. This method not only protects your window frames from damage but also makes the installation process cleaner and less intrusive. Ready to chill out without the hassle? Let’s jump into how you can install your window AC unit without reaching for the screwdriver.
The Benefits of Installing an Air Conditioner on a Window Without Screws
Preserve Your Window Frames: One of the primary benefits is the preservation of your window frames. Traditional installation methods can lead to unsightly holes and potential structural damage. By opting for a no-screw installation, you maintain the integrity of your frames, saving you repair costs in the long run. Enhanced Flexibility: With no permanent alterations to your window, you have the flexibility to remove or relocate the air conditioner as needed. This is particularly advantageous for renters who may face restrictions on making modifications to their living space. Reduced Installation Time: Screwless installation can be significantly faster, as it removes the steps of drilling and screwing. Streamlining the process allows for a quicker setup so you can enjoy cool air without the lengthy preparation work. Safer for DIY: Without the need to handle power drills or screws, the potential for installation-related injuries is reduced. This provides a safer DIY project for you, especially if you’re not accustomed to using power tools. Economic Advantages: By avoiding damage to your windows, you not only save on potential repair costs but also retain the value of your property. Also, the ability to uninstall and reinstall the unit without professional help can lead to substantial savings. Aesthetic Appeal: No more unsightly screw heads or brackets. A screwless air conditioner installation ensures a cleaner and more visually appealing look, preserving the aesthetic of your room and window design.
Preparing for Installation

Measuring the Window
Before you start the installation process, accurate measuring is crucial. You need to measure the window opening to ensure the air conditioner will fit properly. Here s how you do it:
- Open your window to its fullest extent.
- Use a tape measure to determine the dimensions from side to side and then top to bottom.
- Note down the height against the window to prevent measuring along a potential slope of the sill, which could give an inaccurate number. To avoid common mistakes, remind yourself that sills can angle away from the window. This may give you a reading that’s too large and may result in a poor fit for your unit.
Plus, you should know the square footage of the room you intend to cool. For example, if you have a room that is 11 feet wide and 12 feet long, then its area is:
| Length (feet) | Width (feet) | Square Footage |
|---|---|---|
| 11 | 12 | 132 |
Make sure your room’s dimensions fall within the recommended coverage area for the air conditioning unit.
Gathering the Necessary Tools and Materials
A seamless installation requires the right tools. Fortunately, you ll likely have most of them at home already. Here’s what you ll need:
- Sturdy stool or bench: To safely support the AC unit during installation.
- Utility knife: To cut and adjust weather sealing.
- Power drill: For quick, efficient creation of pilot holes if required.
- Screwdriver: Essential for any adjustments to the AC components or window fittings.
- Torpedo level: To ensure your AC unit sits level on the window sill.
- Tape measure: For all necessary measurements during setup.
Items such as wood for creating a frame may vary based on size and type. For instance, 2x4s are commonly used, but you may need different lumber sizes depending on your specific window setup. Also, 1/2″ deck screws are typically long enough to assemble wooden frames securely. Having a helper is recommended, especially with larger, heavier AC units. They can support the unit while you focus on securing it in place. Remember, preparation is key to a straightforward and successful installation.
Step-by-Step Guide to Installing an Air Conditioner on a Window Without Screws

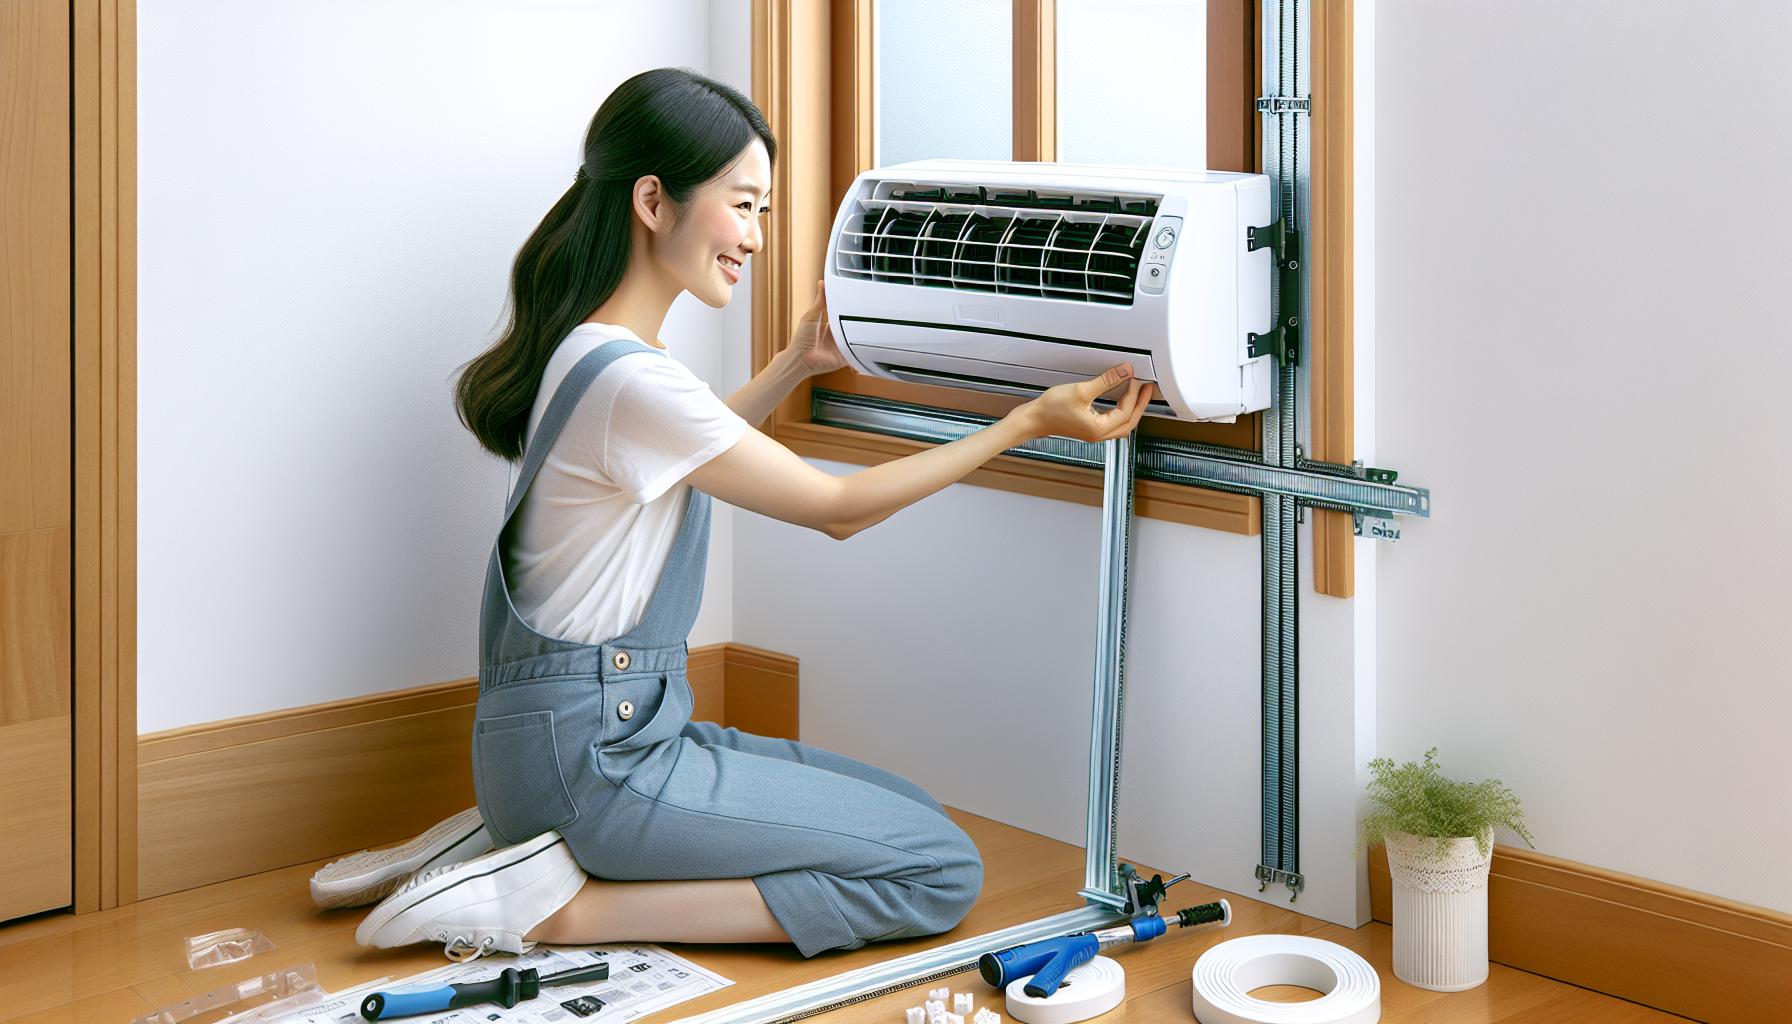
Cleaning the Window
Before you get started, cleaning the window is critical. A dirty window could interfere with the seals and supports you’ll apply, reducing the efficiency of your air conditioner. Wash the glass, windowsill, and frame, removing all dirt and debris. Also, mark the centre of the windowsill with a pencil; this aids precise placement of the air conditioner later, ensuring it’s even and the side panels make proper contact with the frame. Lock the bottom window sash in a raised position temporarily, using a screw or a piece of wood, to prevent it from shutting as you work.
Sealing the Window
Your next move is to create an airtight seal. Weather stripping plays a crucial role here, acting as an insulator and sealant around the window unit. Even if your air conditioner comes with some, having extra strips at your disposal is prudent. Carefully apply the weather strips around the contact points and along the window frame to eliminate any potential air gaps. This step ensures you won’t lose cool air, thereby optimising the unit’s efficiency.
Installing the Bracket
Although not all air conditioners require additional support, heavy units exceeding 100 pounds mandate the use of a support bracket. This is non-negotiable in certain locales, including New York City, where regulations enforce it for every window AC unit, irrespective of its weight. Fit the bracket according to the manual’s instructions, ensuring it can bear the unit’s weight. Prices for these brackets may range from $30 to $100, and you can secure them from home improvement centres or online platforms.
| Price Range for AC Brackets | Cost |
|---|---|
| Typical Range | $30-$100 |
Mounting the Air Conditioner
With everything set up, you’re ready to place the air conditioner. With help, align the central marks previously made on both the window sill and the AC unit. Once lined up, you’ll be able to lower the window sash to rest on the AC unit securely. Ensure there’s no movement and that the unit sits flush with the window frame; this will be your green light that the air conditioner is positioned correctly and is ready for use. Remember, air conditioners draw considerable electricity, so make sure they’re plugged into an appropriate circuit. Refrain from using an extension cord, but if necessary, only use one that’s rated for air conditioners or major appliances. After ensuring the air conditioner is securely in place and powered adequately, you’ll have successfully installed your window AC unit without using a single screw.
Tips for Efficient Cooling
 Efficient cooling not only ensures comfort during hot weather but also helps in reducing energy costs and extends the durability of your air conditioner. Focusing to certain details during the installation process, you can maximize the cooling efficiency of your window air conditioner.
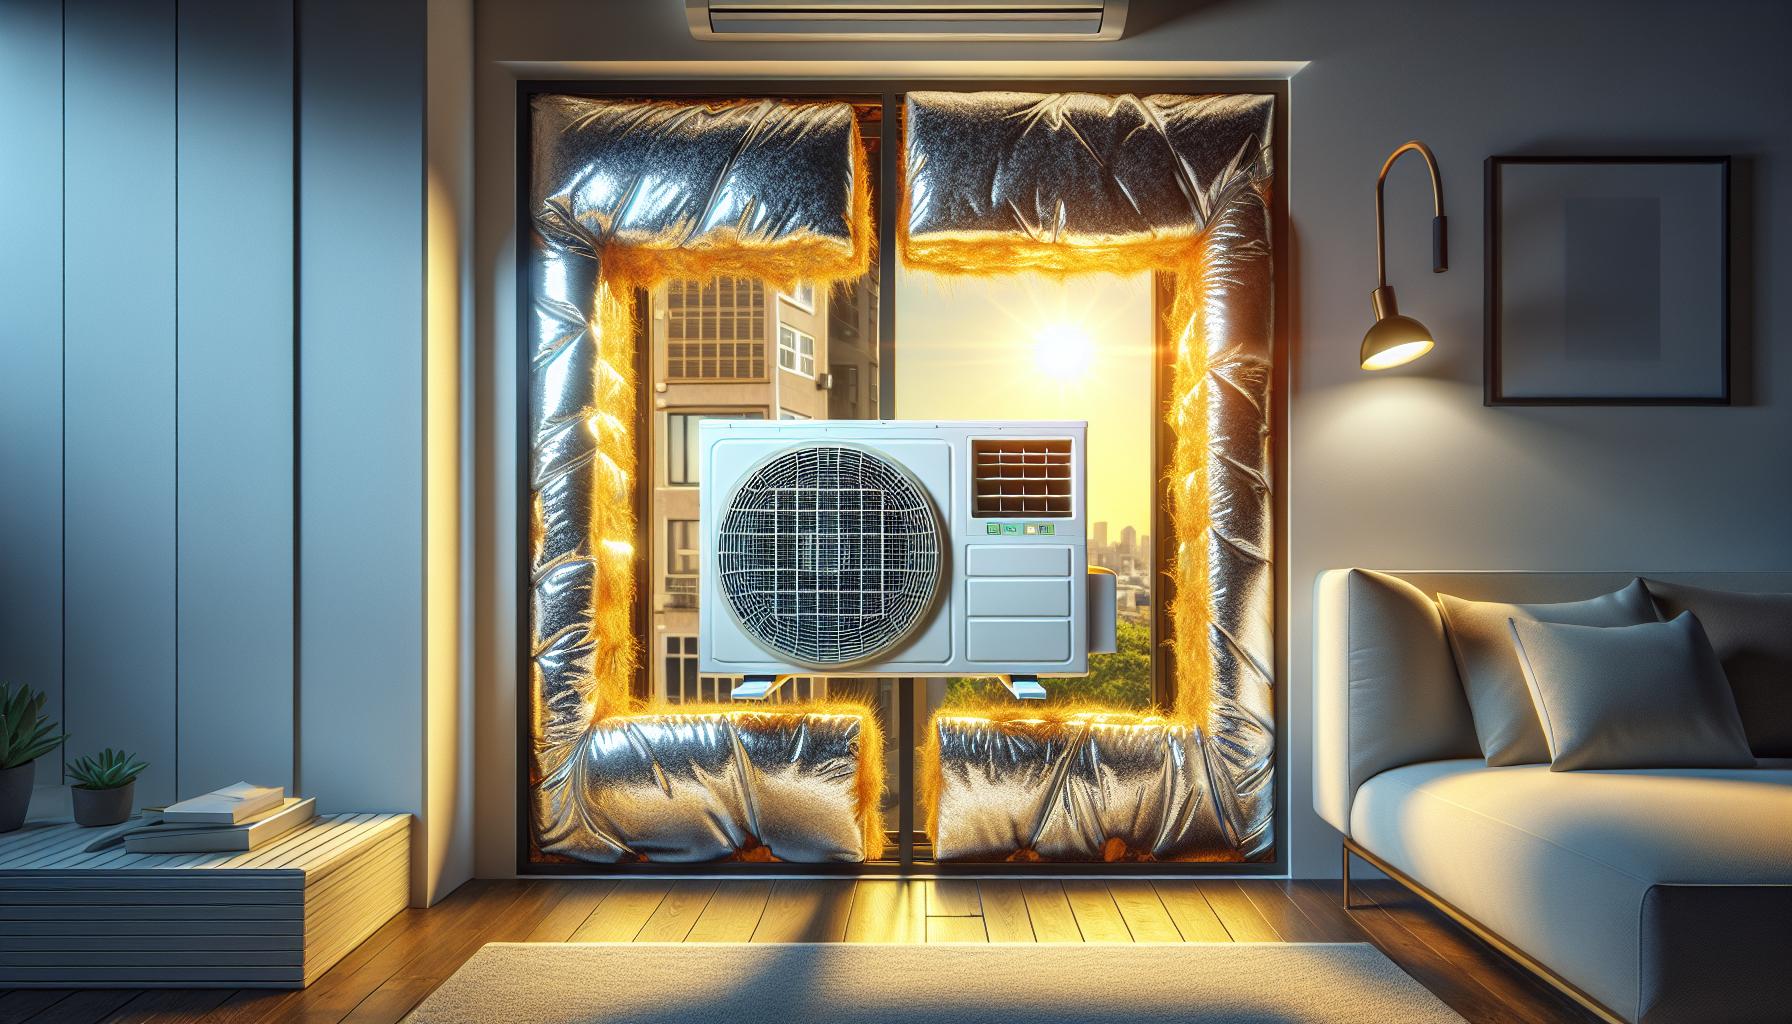
Insulating the Window
Proper insulation of the window where your air conditioner is mounted is crucial. Insulation prevents cool air from escaping and hot air from entering, which can dramatically affect the efficiency of your AC unit. Here’s what you need to do:
- Seal all potential air leak points around the window frame using weather stripping. This will create an airtight barrier between the interior and the exterior.
- For windows that receive direct sunlight, consider adding reflective insulation or UV-blocking window film to reduce heat gain.
- If your window has an air sealing lip, ensure that the air conditioner aligns with it properly to maintain the seal. This may involve positioning baffles correctly to stop air leaks.
Choosing the Right Air Conditioner
The performance and efficiency of your air conditioner are tied to choosing the right model for your space. Keep these points in mind:
- Select an air conditioner with an EER (Energy Efficiency Rating) of 10 or higher, as recommended by the US Department of Energy.
- Ensure the BTUs (British Thermal Units) match the size of the room. The following table shows the recommended BTUs for room sizes:
| Room Size (square feet) | BTUs Required |
|---|---|
| Up to 150 | 5,000 |
| 150 to 250 | 6,000 |
| 250 to 300 | 7,000 |
| 300 to 350 | 8,000 |
| 350 to 400 | 9,000 |
| 400 to 450 | 10,000 |
| 450 to 550 | 12,000 |
| 550 to 700 | 14,000 |
| 700 to 1,000 | 18,000 |
- Pay attention to the physical fit of the AC unit for your window type and size, and verify if additional support brackets are needed.
Setting the Optimal Temperature
Adjusting your air conditioner to the optimal temperature is a fine balance between comfort and cost-efficiency. – The ideal temperature setting for most households is between 24 C to 26 C (75 F to 78 F). This range is comfortable for most people and won’t strain the air conditioner.
- During peak temperatures, avoid setting your AC too low as continuous operation at these cold settings can lead to increased energy consumption without substantial benefits.
- Use programmable thermostats or smart AC controllers which can learn your preferences and adjust temperatures to conserve energy while keeping the space comfortable.
By following these tips, you’re on your way to maintaining a cool and pleasant environment in your home during the hot seasons while keeping your energy bills in check.
Conclusion
You’re now equipped to install your air conditioner without screws ensuring your space stays cool without any permanent changes to your window. Remember, a clean window and accurate placement are key to a successful installation. With the weather stripping in place, you’ve created an efficient seal that will keep the cool air in and the heat out. If you’re dealing with a heavier unit, don’t forget that a support bracket is your friend. Finally, by insulating your window and selecting the appropriate air conditioner, you’ve set yourself up for a summer of comfort and energy savings. Just set the optimal temperature and enjoy the cool breeze on those hot days.